Wednesday, January 30, 2013

Pinterest Inspiration

This week on the Epiphany Crafts Blog it's Pinterest Inspiration week.  I have to say I am pretty addicted to Pinterest there are so many amazing projects and photos, major eye candy!
 
For my project I found these cute matchbox favors on the pinterest site and decided to make some for Valentine favors for my sons teachers.


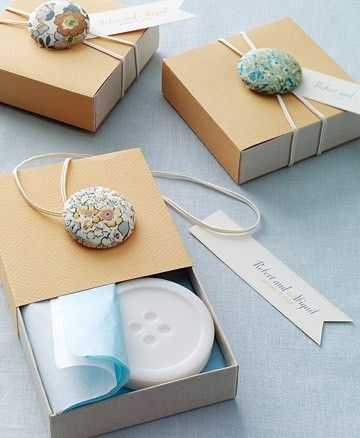
To make the matchboxes, cut box template from patterned paper and fold.
 
 
Add a cut out heart and using the Epiphany Crafts Button Studio Tool Round 14 and the coordinating Button Studio Accessories create a button. 
 
 
Attach the button to the heart using some gold embroidery thread.


For some cute little favors inside the box I made some cute button bookmarks and bobby pins.


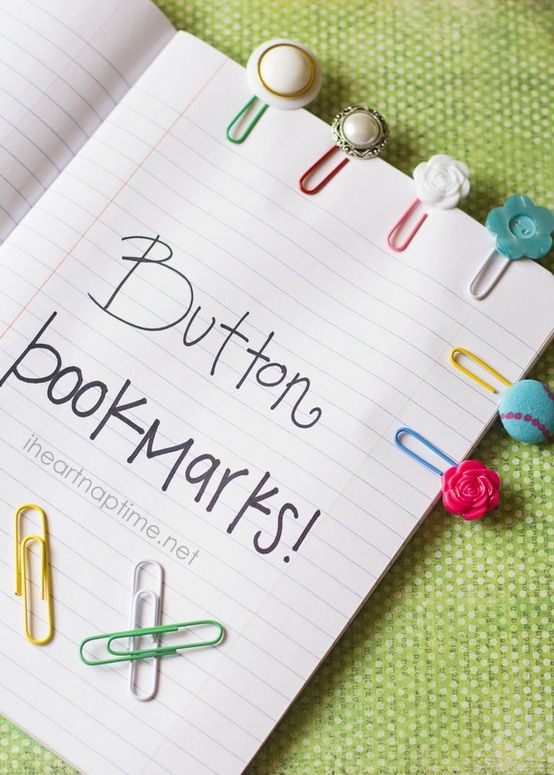
To create the button bookmarks use the Epiphany Crafts Button Studio Tool Round 14 and the coordinating Button Studio Accessories to create a button.

 
Cut out a coordinating heart.
 
 
Using embroidery thread tie the button onto the top of a large paperclip.
 
 
I added them onto a cute tag to give to the recipient.


Here are the bobby pins favors.


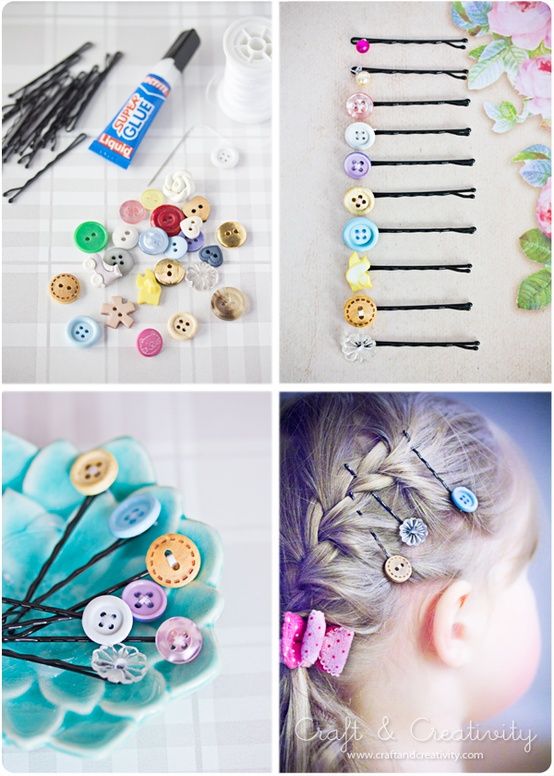
To create the button bobby pins use the Epiphany Crafts Button Studio Tool Round 14 and the coordinating Button Studio Accessories create a button.
 
 
 Using embroidery thread tie the button to the top of the bobby pin.
 
 
I had so much fun doing these projects from Pinterest.  Stop by the Epiphany Crafts blog to see all the other amazing Pinterest projects.
 
Thanks for stopping by.


Tuesday, January 29, 2013

Imaginisce Good Dog

I am up on the Imaginisce blog today with my projects for their new release Good Dog.  I really loved the colors and die cuts in this collection, so cute!
 
For my first project I made a Dog Leash Hook. What dog doesn’t need their own special place to hang their leash and doggie bags? 
 
 
To create this Dog Leash Hook I covered some heavy clipboard wood with patterned paper and added some hooks. I used all the fun sticker, chipboard and die cut embellishments that come in this collection.
 
 
I especially loved the dog bone so I added it with some foam tape to give the project some dimension.
 
 
For my second project I made a Photo Holder for this sweet photo of my friends dog Gadget.  I started with a giant clothes pin and covered it with patterned paper. 

 
 I added a banner shape and cute sticker to the centre of the clothes pin. 
 
 
For additional embellishments I cut out some little paw prints and used foam tape to attach them.To finish off the holder I added some coordinating twine.
 
 
This collection is perfect for all the fur babies in your house!  Head on over to the Imaginisce Blog to see more amazing projects using this collection.
 
Thanks for stopping by.

Friday, January 25, 2013

Childhood Memories

All this week Imaginisce is sharing projects made with their new collection Childhood Memories.  You can see two of my projects on their blog today!  I will be sharing more later this month.
 
My first project is this layout of my son skateboarding.  I love the fun colors and patterns in the Childhood Memories collection and wanted to show them all off. 
 
 
I cut the chevron file with my Silhouette and filled in the spaces with all the colors of the patterned papers.  I used the cut out parts to create some more arrows to lead the eye to the photo of my son skateboarding and also some fun confetti down the left side of the page.


I also really love the 3D stickers that come with this collection, perfect for my son who is always riding some wheels or another, like his skateboard, scooter or bike.


My second project is an Instagram mini album.  The camera paper, stamps, stickers and chipboard in this collection are so perfect for a little Instagram mini album. 


 To create this mini album I made the cover out of patterned paper and added the cute camera sticker to the cover with a Polaroid frame around it.


 For the inside pages I used patterned paper and embellished them with the stickers and stamps.  Here's some of the inside pages with details.


 I really love this banner stamp, perfect for adding some journaling.


 The theme of this collection is great for documenting all the fun times that kids have while growing up.
I hope you head on over to the Imaginisce Blog and see all the wonderful projects made with this really fun collection.

Thanks for stopping by.

Wednesday, January 23, 2013

Ski

My boys love to ski, I love seeing them all decked out in their snow gear especially the giant goggles, makes me laugh every time.
 
 
To create this layout I used the Epiphany Crafts Shape Studio Tool Pennant 25, Epiphany Crafts Bubble Caps Pennant 25, Epiphany Crafts Shape Studio Tool Scalloped Circle 25, Epiphany Crafts Shape Studio Accessories Bubble Caps Scalloped 25 and the Crate Paper Sleigh Ride Collection.


I used the Pennant shape tool to make these snowflakes by adding them in a cross then again in a cross between the first cross (hope that makes sense).
 
 
I finished off this snowflake with the scalloped Circle Bubble Cap in the centre.


I sprayed the Studio Calico wooden snowflakes with Glimmer Mist then while it was still wet sprayed it with the Studio Calico Calico Shine to make them shimmer.


Thanks for stopping by.

Monday, January 21, 2013

With Love

Valentine's Day is coming up fast and furious.  I am all ready making some fun bags for teacher's and friends to fill with treats.
 
For this one I used some My Little Shoebox paper and stickers and my Epiphany Crafts Scallop tool to punch the centre of the LOVE sentiment.

 
I added some pink washi tape and Studio Calico wooden hearts.

 
I really love how the LOVE looks with the centres punched out and popped up with foam tape. 

 
Thanks for stopping by.

Friday, January 18, 2013

Altered Tin

I needed a quick gift card holder and thought an altered Altoid tin would be the perfect size.

 
I covered the tin with Bella Blvd patterned paper and fussy cut some flowers for the top.

 
I added some foam tape to pop some up for dimension and a cute sentiment sticker.

 
I wrapped the lid with twin and covered the bottom outside with paper.

 
Inside I added some more patterned paper to the lid and bottom.

 
I also added some curled up paper to give it a party feel when they open it.

 
Thanks for stopping by.

Wednesday, January 16, 2013

Cards

Today is just a quick share of some cards.  Usually at the beginning of the year I like to use up my stash (before the new CHA goodies come out) and make a bunch of cards for the year.  I try and make as many as I can so when a birthday or thank you card is needed I can just grab one.
 
I made the first card with paper from Pebbles and some Studio Calico wooden butterflies.
 
 
I made the squares behind the butterflies with some matching washi tape.

 
A little twine for the butterflies antenna to finish it off.


For the second card I made a flower with scalloped circles and used the negative where I punched out the circles as well.

 
Added a cute Hi sentiment and some twine.


The third card is also a scallop circle flower and I used up the rest of the washi tape stickers that coordinated with the Pebbles paper.

 
I loved these little stickers, so sweet.


And last another scallop circle flower with a button in the centre

 
I added some knotted twine for a border along the edge.

 
I love having these cards handy so that if I don't have time to create one I know I always have a few pre-made and it's a great way to use up your stash.
 
Thanks for stopping by.